Pages

Saturday, October 23, 2021

Weaving and knitting projects started


How long ago was the last time I prepared a warp for weaving? According to Google photos it was May, 2017, and it stayed on for 3 years. Well, since I only weave out of curiosity, there's no rush to finish, the discovery of "what happens if" is enjoyable in itself. I have not woven with Cottolin yarn (a blend of cotton and linen) before, but I love the bright colors, so this should be fun!


For those interested the loom I'm using is relatively small, a 24 inch wide 8 shaft table loom on a stand. I'm threading a pattern from page 39 in "A Weaver's Book of 8-Shaft Patterns" edited by Carol Strickler.  

Also I have started knitting a sweater, for myself. It's an open front cardigan with knitted lace edging designed by Bronagh Miskelly. The pattern is "Spring Leaf" found in Knitting Magazine, April 2017. The yarn I'm using is luxuriously soft, spun from Tibetan Yak hair. My first time using this fiber and I'm loving it! The color is Hokkaido, which is also the name of an island in the north of Japan. To me it looks like a medium toned, muted grayish purple.


Exploring other crafts is refreshing, and can spark new ideas for tatting, also. So do not worry that my tatting or hand dyeing will be neglected. In fact, I have a large batch of skeins already prepared for dyeing next week. The colorway will be "Stardate".

Tuesday, October 12, 2021

Tatting Encapsulation for Tiny Flowers


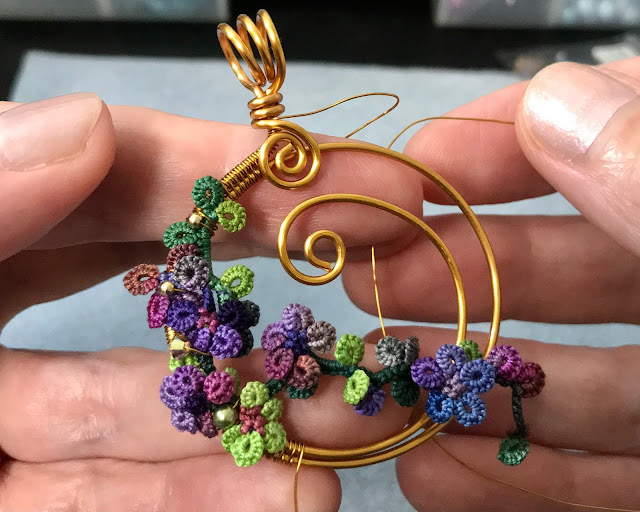
People have been asking about how I am tatting the tiny "flowers" that I've been putting onto my wire pendants. The flowers can be used in embroidery, too. So, here is a repeat of my encapsulation tutorial from July 31, 2017. 

The encapsulation technique for little flower motifs


You need at least 3 threads. For this demo I used a continuous multicolored thread on 2 shuttles plus a contrasting color on a 3rd shuttle. 


The threads can be knotted together, but I like to get started without a knot. I pick up one of the shuttles with the continuous thread, which is the color that I want for the rings (flower petals), and tat a Josephine ring (a ring made using the same half stitch repeatedly)

Note: I like to use the 1st half of the double stitch only, because it gives a tighter ring. But, the 2nd half of the double stitch can be used instead, for a looser look. The differing results are because the 1st half tightens the twist in the thread, the 2nd half loosens the twist. I usually put 9 to 14 half stitches in these rings, which must be closed carefully because the thread wants to kink.


After closing the ring, a short chain follows. Hold both of the continuous threads and the tail of the contrasting thread. The tail needs to be long enough to tension it along with the other threads for the multiple core of the chain. 

(Note: at some place along the "stem" of the flower motif the tail can be abandoned and cut off later. This is how I start the motif without a knot and no tails to sew in.)


 Wrap 1 unflipped double stitch over the multiple core threads. I used 2nd half first, 1st half second in this photo, which makes a downward facing curve.


Pick up the same shuttle that you used for the first ring to tat the next ring (the next "petal"). It is important to keep a main core thread sliding freely inside the chains for the flower, to be able to snug the flower up tightly when it's done. Only after the flower is closed, can any of the threads be used freely.


Follow each ring with an unflipped double stitch wrapped over the multiple core.


Use as many petals as you wish for the flower. Follow the last ring with 1 unflipped double stitch chain. Then, to close the flower and continue with a chain for the "stem", put the chain thread on top, leaving the multiple core threads below, between the 1st and 2nd rings.


Wrap unflipped double stitches for the "stem" chain. 
  • If you want the stem to curve upward, bring the wrapping thread under the multiple thread core, then tat first half, 2nd half. 
  • To curve the stem downward, leave the wrapping thread below the core and tat 2nd half, 1st half.

After a few stitches, pull the main core thread to tighten the flower. From time to time, also tug the other threads to keep everything nice and tight.


Continue in any way you wish, throwing off "leaves" and "buds" using any of the threads, adding more "flowers" as you like. 

To end off, the extra threads can be hidden inside the final rings, and the last ring can be a single shuttle split ring, leaving no tails to sew in. Have fun!

Tuesday, October 5, 2021

An Experiment with Bina's Layered Chain Technique


"Devotion" heart tatted with layered chains

This was the first time that I used Layered Chains in a finished project, and I wanted to learn how far I could push the limits of the technique.

The chains in 2 colors, layered on top of each other were tatted using Sabina Carden-Madden's technique of Layered Chains. This is a variation of pearl tatting technique that was published in the Winter 2006-2007 issue of "The Bulletin" by I.O.L.I (International Organization of Lace). 

The Layered Chains:

Fill 2 shuttles, each with a different color thread, and leave the thread attached to the balls.

Hold both ball threads for the core, same as for pearl tatting.
I used the light color for the bottom (inside chain), and the dark color for the top (outside chain). So, since I'm right handed, the light color (shuttle 1) was at my right hand, and the dark color (shuttle 2) to the left.


Tat a normal double stitch using ONLY the light color (bottom) core thread.


The double stitch is flipped as usual. I've shown only the first half in progress in the photo.


After each bottom double stitch, use shuttle 2 (dark thread) to wrap an unflipped double stitch over both core threads. I've shown only the first half in progress here. Notice that the top stitch (dark) is wrapping around both core threads, but NOT the shuttle 1 thread.

Continue alternating the bottom and top stitches in the same way. Both are 1st half, 2nd half as usual, but the top ones are unflipped. 

Count the stitches as usual, remembering to finish the same number of stitches each side.

To curve the chain, pull shuttle 1 only.


This is how the finished tatting looked before blocking. Very crowded and curled up, which is not the result I have when this design is made using normal tatting. So, I am thinking that it would be better to choose a pattern with more open space in it, to leave room for the bulkier layered chains.


I found that I like what I had considered the "back side" better than what I had thought would be the "front side"! Here are pictures of both sides. 


This Layered Chain technique is slow and requires concentration. I found it very fiddly at first. Eventually I was able to develop a sort of rhythm, if not speed. I enjoyed seeing the results!