
Thursday, December 28, 2017
Elegance Earrings video demo
The pattern Elegance earrings is found in Boutique Tatting.
This video is the result of people reminding me that I haven't made a video in a while, plus I wanted a new pair of earrings for New Year's Eve with a lot of bling!
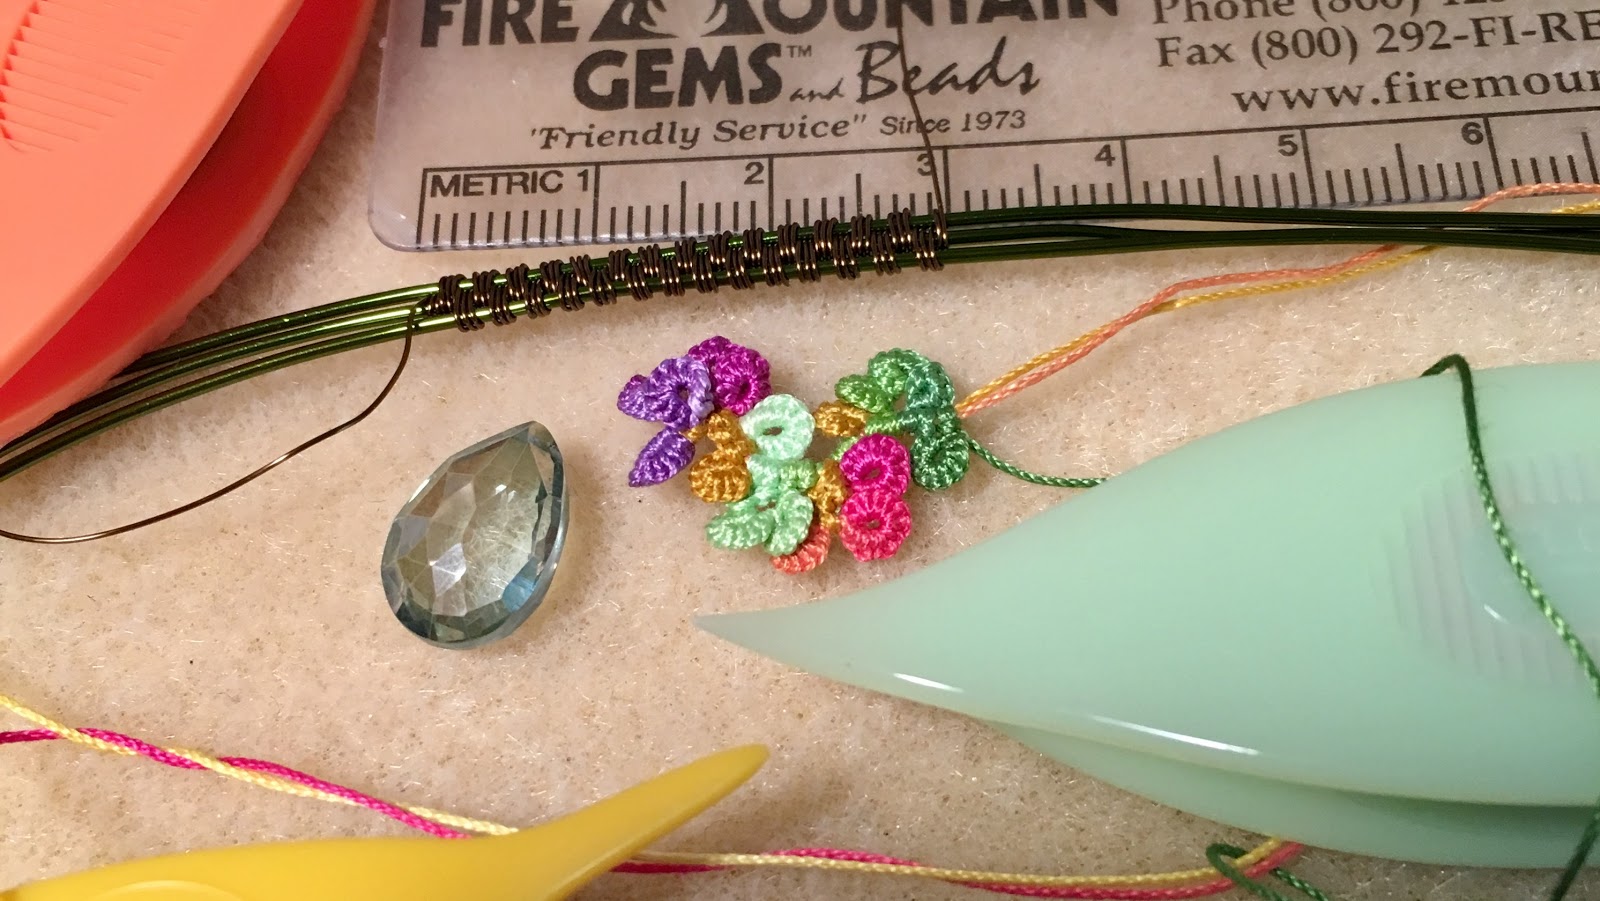
If anyone is wondering about the pink leaf teardrop beads that show in the background but aren't used in the earrings, they were originally "plan A", but I decided on the gold drop beads instead. I played with colors! All of the beads are the size called for in the pattern, except the smaller gold seed beads were size 15/0 instead of size 11/0. The thread used was my own hand dyed, size 20 in "Roses".
Naturally, I edited out a lot of the boring, repetitious parts, so tatting the actual earring will take longer than 11 minutes for most folks! I do hope that the video helps make the tatting techniques and the design a bit more understandable.
Tuesday, December 12, 2017
Found from 2008: Quickie Snowflake Earrings


Naturally, it's only the basic pattern, but can be embellished! I've done them with a bead in the center and additional, smaller seed beads in the picots (as shown in the 2nd and 3rd photos). In those variations I used size 40 thread, a 3mm center bead, and either size 15 or demi seed beads.

Leaving you with this, as I have a busy week. I'm a serious amateur cellist and I have 2 concerts this week, including the one shown on the flyer below. I also play and sing in the church choir. So, that's what I'm up to! After Christmas, I'll have time to finish writing up the pattern for the Milkweed pod and will be hand dyeing more thread for my Etsy shop.

Tuesday, November 28, 2017
Metallic thread experiment 2 = success!


The work in progress
The Simthread from Rita Richmond at Shuttle By Design worked well! I was able to tat my split rings around beads and close them without problems. The thread also stood up to undoing mistakes.

Want a chance to win some hand dyed thread AND help out one of my friends who is battling Multiple Sclerosis? Donate any amount at this Go Fund Me fundraiser and let me know about it in your comment below. I’ll choose a winner from those who helped.

Wednesday, November 22, 2017
Metallic thread experiment 1


Rita Richmond of "Shuttle By Design" sells a different brand of metallic thread that is 3 ply. I've placed an order for some! When it arrives, I'll test tat it!
In the meantime, I decided to tat an atom of Lizbeth thread (River Blue medium) and get more scientific (using the term VERY loosely) with particle theory by adding "neutrinos" and "quarks" simply by adding tiny beads :-D

Tuesday, October 31, 2017
Pod
 |
| A tatted pod, inspired by milkweed pods. I'm surprised this attempt at pod design actually worked! |
 |
| I started with a center row of split rings. After that, I add each side separately. No pattern yet, but I plan on writing it up. |
 |
| More split rings around the edges, and a pod shape starts to form. I used 2 shades of color so that I could remember what I did where. A final row of chains with joins produces the 3 dimensional shape. |
 |
| Tatting friends posted lots of great ideas for filling the pod on my Facebook Page. For myself, though, I am taking on the challenge of mimicking the seeds. I don't have a picture of a newly opened pod with most of the seeds still inside, but that's what my plan is to try to do. All will be written and diagrammed out, eventually. |
Wednesday, October 18, 2017
Spooky

On Saturday, October 21st, the Tollway Tatters will be gathering at the Hinsdale Oasis on the Illinois Tollway. Looking forward to it!


Wednesday, October 4, 2017
Sugar Maple

I managed to get outside for a walk in the woods today; Havenwoods State Forest to be specific. It really did wonders to calm my spirit. While there, I spied this milkweed. Something about the design intrigues me. The color, not so much. I'll think about it, until something else grabs my attention.


Saturday, September 16, 2017
Mad scientist mode!

I only wear the mask when working with the dye in powder form to avoid breathing it in. When the dry dye is put away and I'm working with the liquid dye solution, I take the mask off. But, the rubber gloves stay on!


Tuesday, September 12, 2017
Hard and soft combined

 I used Parawire in 2 colors, "Army Green" for the three base wires in 20 gauge, and "Vintaj Natural Brass" in 28 gauge.
I had to start twice, because the first time I wasn't sure about the weave structure and made mistakes. Probably only another wire weaver would have noticed, but I did, so I started over to do it right!
When adding the tatting (see this previous post on that technique) I attempted to keep the wire weaving pattern as undisturbed as possible. In my earlier pieces my weaving tended to be messy at that area but it doesn't need to be. The tatting only needs to be caught with wire now and then, as if one were adding a bead.
Parawire, or any coated wire can be marred or scratched easily with tools such as pliers, so I did most of the shaping by hand. Serious jewelry artists usually avoid coated wires but since I'm breaking the rules already, why not have fun with the color choices? And, obviously, I'm not going to do any oxidizing or any other processes that would harm the tatting.

I do have some solid wires in my stash as well, such as solid natural brass which I used in the frame findings and jump rings on the earrings below. The solid brass will naturally patina or get darker over time, but that is okay.

Monday, August 28, 2017
New pattern: Heart Aglow


The idea started as a motif or pendant that would be easy enough for new tatters. Then, I thought that the same pattern in smaller thread and beads would be good for earrings. My test tatter, Sue Anna suggested the bracelet idea, and so now there's a set of matching jewelry.
It's really a simple, one shuttle and ball pattern that grew into an 8 page tutorial! Easy level for tatters that know how to tat rings, chains, and joins, and good practice for tatting with beads.


Monday, August 21, 2017
Eclipse sale!

https://www.etsy.com/shop/yarnplayer?coupon=ECLIPSE
Why 17% ? Because in my area the eclipse will cover all but 17% of the sun. Also, it's the year 2017 and I've had my Etsy shop for ten years!

Friday, August 18, 2017
Designing a new pattern

On Saturday, August 19 the Tollway Tatters will be gathering at the Hinsdale oasis. I need to get my tie-dyed t-shirt out of the laundry to be ready!
Saturday, August 12, 2017
Turquoise stone donut wire wrapped + tatting

A stone with shades of green and black as well as turquoise blue provided the impulse to seek out thread to match. I used my own hand dyed from the "Pond" and "Adventurer" batches to tat the little flowers, using the encapsulation technique described in a previous post.

 |
| Back of the pendant |
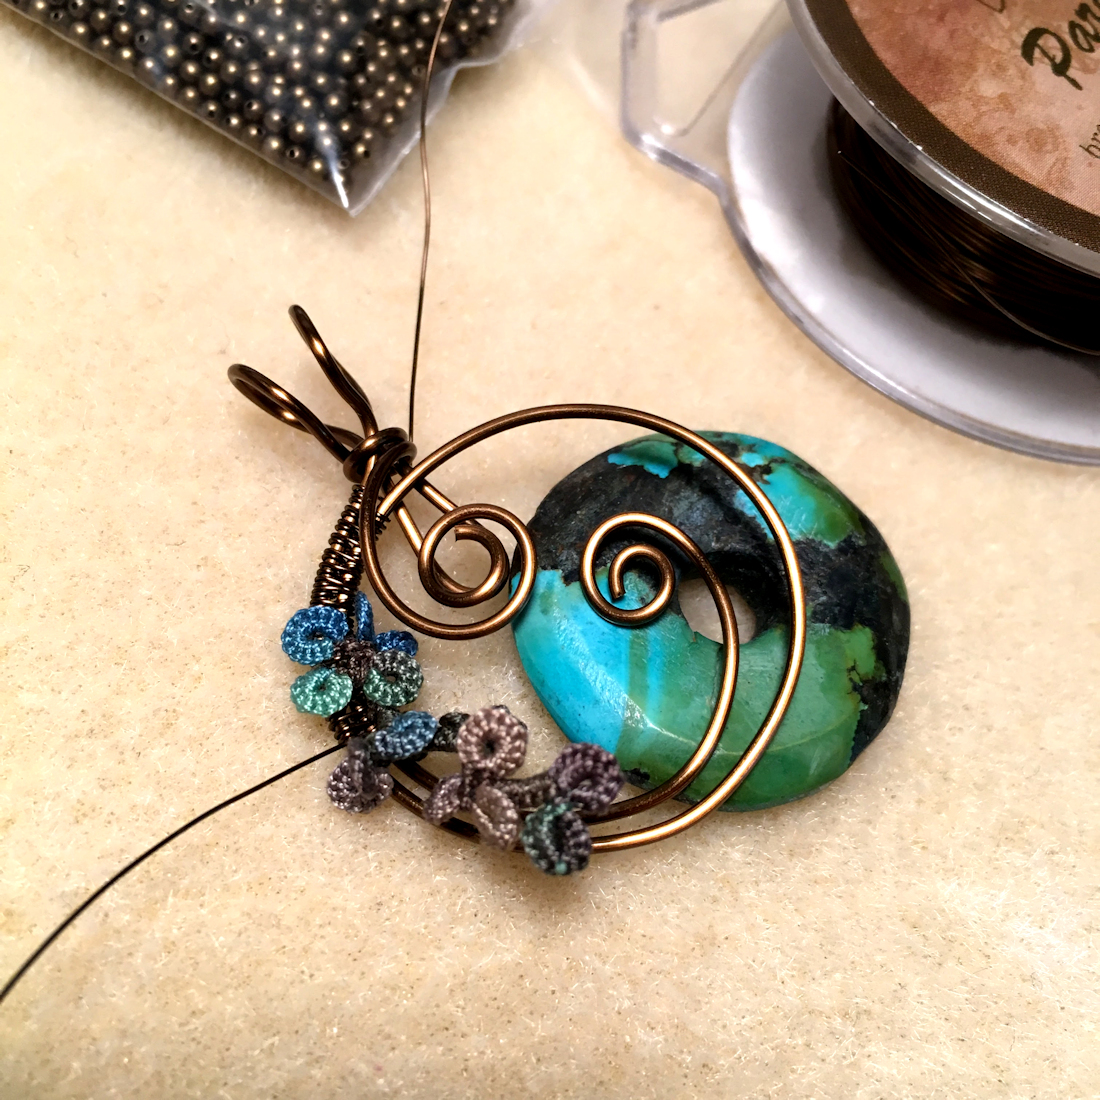 |
| The wire wrapping in progress |
Monday, July 31, 2017
Encapsulation and the stone pendant

I tatted the flower motif separately. Then, when I got to the place in the wire-wrapping where I wanted the tatting to be, I wrapped the wire over the tatting. To clarify, I only wrapped the wire over the tatting in a few places, to catch it in place. I folded the tatting out of the way to continue the wire-wrapped pattern underneath.
The methods I use for tatting the little flowers are Josephine rings (rings tatted using only the same half stitch repeated) and encapsulation (tatting over multiple core threads). Scroll down for the tutorial on these techniques.
 |
| Wire weaving in progress. |
 |
| Catching the tatted motif in place, while continuing to weave the wire under the tatting. |
 |
| The front side of the finished pendant. |
 |
| The back side of the pendant. |
Here's a tutorial on the encapsulation technique that I use for the little flower motifs.
 |
| You need at least 3 threads. For this example I used a continuous multicolored thread on 2 shuttles plus a contrasting color on a 3rd shuttle. |

 |
| After closing the ring, a short chain follows. Hold both of the continuous threads and the tail of the contrasting thread. The tail needs to be long enough to tension it along with the other threads for the multiple core of the chain. (Note: at some place along the "stem" of the flower motif the tail can be abandoned and cut off later. This is how I start the motif without a knot and no tails to sew in.) |

 |
| Pick up the same shuttle that you used for the first ring to tat the next ring. It is important to keep a main core thread sliding freely inside the chains for the flower, to be able to snug the flower up tightly when it's done. Only after the flower is closed, can any of the threads be used freely. |
 |
| Follow each ring with an unflipped double stitch wrapped over the multiple core. |
 |
| Use as many petals as you wish for the flower. Follow the last ring with 1 unflipped double stitch chain. Then, to close the flower and continue with a chain for the "stem", put the chain thread on top, leaving the multiple core threads below, between the 1st and 2nd rings. |
 |
| Wrap unflipped double stitches for the "stem" chain. If you want the stem to curve upward, bring the wrapping thread under the multiple thread core, then tat first half, 2nd half. To curve the stem downward, leave the wrapping thread below the core and tat 2nd half, 1st half. |
 |
| After a few stitches, pull the main core thread to tighten the flower. From time to time, also tug the other threads to keep everything nice and tight. |
 |
| Continue the flower motif any way you wish, throwing off "leaves" and "buds" using any of the threads. To end off, the extra threads can be hidden inside the final rings, and the last ring can be a single shuttle split ring, leaving no tails to sew in. Have fun with it! |
Subscribe to:
Posts (Atom)