Tuesday, April 28, 2020

Macrame Nylon Loop Zipper Pull


How to add a zipper pull loop to a motif using macrame cord:


Cut a piece of nylon or polyester macrame cord about 12 inches (30 cm) long. 
Fold it in half. Put the cut ends down through the motif where it will be attached.


Pull the ends through until the loop is at the desired size.
It is easier to keep the cord in place by pinning it down.


Now begin a square knot sinnet. The 2 cut ends are the working cords. The loop is the filler.


Bring the right working cord over the filler to the left. 
Place the left working cord over it, under the filler, and through the loop formed by the right cord. 
Tighten, and you have the first half of a square knot.


Bring the left cord over and to the right of the filler.
Place the right cord over it, under the filler, and through the loop formed by the left cord.
Tighten, and you have a finished square knot.


Repeat square knots for desired length of sinnet. If you forget which half comes next, look to see which side has a completed knot "bump". That's the side to pick up the working cord from.


Trim the tails to about 1/4 inch (6mm).
Carefully melt them with a safety lighter, observing all safety precautions. Press the melted drops into the knot with the edge of the lighter. Or, press with your thumb, but take care to not get burnt.


Attach to anything!

Thursday, April 23, 2020

Left handed Tatting a Simple Motif


This simple motif is good for beginners to practice double stitches, picots, rings, chains, and the join.

The right handed version has also been uploaded to my YouTube channel. Actually, the left handed video is simply my right handed original flipped mirror image using an app! Works great...except silly me, I forgot that "counterclockwise" would become "clockwise" in the lefty version. Oh well!

I used "Elisa" size 5 thread for the demo. I love the size and the thread is perfect! Oh, of course, I hand dyed it :-)

Wednesday, April 22, 2020

Star Capella Pendant Left Handed

Trying to show the left handed folks some love, I've flopped my "Star Capella Pendant" video to be left handed. It mirror imaged the package labels, but everything else works. I hope this helps.

Monday, April 13, 2020

Just Popping In


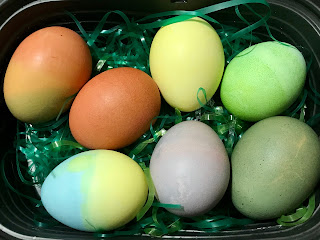
Just popping in for a minute to say blessed Easter and happy spring to you.


I'm still doing hand dyeing of thread, but will wait to list them all until I have a good sized collection.

These Lupines emerging in the garden surprised me by collecting dew and making it glisten like diamonds. I wish you happy surprises!

Wednesday, April 1, 2020

New Pattern: "Petal Portal"

 Just finished! 

My original pattern "Petal Portal" for tatted pendant and earrings is listed for sale as an instant download in my Etsy shop

The tatting techniques used in the pendant are: ring, floating ring, curled ring, chain, picot, bead picot, join, lock join, Celtic weaving, and encapsulation.

The tatting techniques used in the earrings are: ring, floating ring, split ring, chain, picot, bead picot, Daisy picot, join, lock join, encapsulation. 

So, it's a challenging pattern using a lot of techniques. The instructions are written in English from the shuttle tatting perspective. This pattern also has diagrams with stitch counts and some in-progress photos. 

The thread used for the pendant and earrings is size 20, along with size 15/0 seed beads and 4mm beads.


"Petal Portal" green set

The actual colors that I used in the green set are Lizbeth #604, #684, #676, and my own hand dyed "Nectarine".

The actual colors I used in the purple set are Lizbeth #612, #632, and my own hand dyed "Crocus".


"Petal Portal" purple set
I came up with the title "Petal Portal" because the Josephine rings at the bottom looked to me like little flower buds or petals growing, and the open center of the motif seemed to be a gateway or portal leading to somewhere nice.

The tools and supplies that I used for the green set