Showing posts with label encapsulation. Show all posts

Thursday, March 21, 2024

Pattern and video for a menorah in tatting


This design was developed from the branched candlestick photo on page 79 of the book "Tatting Techniques" by Elgiva Nicholls. Although there wasn't much description about it, I could see that the technique was branching encapsulation, so I went on from there.

It's a tricky project to explain, so I made a video. It's on YouTube at https://youtu.be/8mR94S5-GFk?si=0QxP-UdlDLNF1BSb

The PDF pattern is a free instant download from https://www.keepandshare.com/doc/8291924/menorah-pdf-785k?da=y

Please let me know if either of the links won't work!

I made this pattern as sort of a challenge to see if I could do it.☺ Another tatter was looking for a menorah pattern, so I helped search... and found nothing. Only a few rumors that somebody had tatted a menorah, but no pictures could be found online. Well, now there are pictures and video and a pattern.☺ It's a challenging project, though! Recommended for experienced tatters.


Thursday, February 29, 2024

Leap day wishing for Peace


Peace symbol in wire wrapping + tatting

Wishing for peace everywhere to everyone.  

The wire frame before tatting is described on my previous post.

For the center tatting I used 2 multicolored threads plus a green thread, in the encapsulation technique (unflipped double stitches over a multiple thread core). I have a short video on that here, but for this project I kept the flowers small, only 1 "petal" each.
The tiny "flowers" are Josephine rings tatted using the same half stitch repeated, along with an occasional normal ring.

I used only 2 threads, normal tatting in green for the "vine" around the edge. 8 Victorian sets of 2/2 between each Josephine ring. I usually use about 9 half stitches for each ring. 

For the outside edge I generally used the modified soumak weave with 28 gauge wire, changing to simple coiling when the base wires overlapped. I arranged the tatted "vine" around the edge and caught it in the wire occasionally. Some 2mm beads were also included for added texture.
 

This was quite a challenging project for me! More difficult than the usual wire-wrapped + tatting pendants that I've made before, because of the smaller spaces to work the wire into and trying to keep the symbol clear enough to be recognizable. But, I'm happy to have one done that I can wear, and to get more ideas from!


Thursday, February 22, 2024

Sea green Victory and beginning a peace symbol


Done! This "Victory" necklace in my own hand dyed sea green (the darker color) and Lizbeth number 686 Seagreen Lt. My finished necklace is listed in my Etsy shop here and the pattern is there.

Something I learned is to measure the round beads! Just because it says "6mm" on the package doesn't mean that the beads actually measure 6mm! The quartzite stone beads were a little larger, which explains why the tatted ring around the focal bead at lower center didn't quite fit, and it took less beads to make the neck cord the correct length.


So then, I came up with earrings to match, sort of. The last join on these is a rather tricky folded join, but otherwise they're fairly simple. I might write this up as a free pattern someday.


The earrings in progress

_______________________________________________________

New experiment combining tatting and wire-wrapping is in progress! 

I'm trying to make a peace symbol, the iconic 1960s peace symbol, out of wire and adding tatted "flowers" on it in a way similar to my other wire with tatting pendants. We will soon see if this works! 

To form the wire shape I followed the DIY Peace Sign Earrings video demonstration by Heather Boyd Wire on YouTube. Changes I made include continuing the wire up over the top (to form a bail later) and I added a 2nd circle of wire around the outside to make a doubled edge, which makes a wider border and will keep the tatting facing front.

My concern is to keep the peace symbol recognizable while being covered with the tatted "flowers". A work in progress....


Monday, October 17, 2022

Started an Autumn Pendant


From my stash of hand dyed thread, I chose warm autumn colors of red, gold, and shaded greens in a mix of 10 and 20 (but that dark red seems a bit finer, so I'm not sure). Having completed the tatting of josephine rings and encapsulated chains, I'm in the process of wire wrapping it onto the frame. 

I found a pretty orange topaz colored glass briolette focal bead purchased from BastetsBeads on Etsy, planning to suspend it in the center, although that depends on if there's still room for it when I get that far! I don't plan ahead much, I just trust the process. 


Tuesday, October 12, 2021

Tatting Encapsulation for Tiny Flowers


People have been asking about how I am tatting the tiny "flowers" that I've been putting onto my wire pendants. The flowers can be used in embroidery, too. So, here is a repeat of my encapsulation tutorial from July 31, 2017. 

The encapsulation technique for little flower motifs


You need at least 3 threads. For this demo I used a continuous multicolored thread on 2 shuttles plus a contrasting color on a 3rd shuttle. 


The threads can be knotted together, but I like to get started without a knot. I pick up one of the shuttles with the continuous thread, which is the color that I want for the rings (flower petals), and tat a Josephine ring (a ring made using the same half stitch repeatedly)

Note: I like to use the 1st half of the double stitch only, because it gives a tighter ring. But, the 2nd half of the double stitch can be used instead, for a looser look. The differing results are because the 1st half tightens the twist in the thread, the 2nd half loosens the twist. I usually put 9 to 14 half stitches in these rings, which must be closed carefully because the thread wants to kink.


After closing the ring, a short chain follows. Hold both of the continuous threads and the tail of the contrasting thread. The tail needs to be long enough to tension it along with the other threads for the multiple core of the chain. 

(Note: at some place along the "stem" of the flower motif the tail can be abandoned and cut off later. This is how I start the motif without a knot and no tails to sew in.)


 Wrap 1 unflipped double stitch over the multiple core threads. I used 2nd half first, 1st half second in this photo, which makes a downward facing curve.


Pick up the same shuttle that you used for the first ring to tat the next ring (the next "petal"). It is important to keep a main core thread sliding freely inside the chains for the flower, to be able to snug the flower up tightly when it's done. Only after the flower is closed, can any of the threads be used freely.


Follow each ring with an unflipped double stitch wrapped over the multiple core.


Use as many petals as you wish for the flower. Follow the last ring with 1 unflipped double stitch chain. Then, to close the flower and continue with a chain for the "stem", put the chain thread on top, leaving the multiple core threads below, between the 1st and 2nd rings.


Wrap unflipped double stitches for the "stem" chain. 
  • If you want the stem to curve upward, bring the wrapping thread under the multiple thread core, then tat first half, 2nd half. 
  • To curve the stem downward, leave the wrapping thread below the core and tat 2nd half, 1st half.

After a few stitches, pull the main core thread to tighten the flower. From time to time, also tug the other threads to keep everything nice and tight.


Continue in any way you wish, throwing off "leaves" and "buds" using any of the threads, adding more "flowers" as you like. 

To end off, the extra threads can be hidden inside the final rings, and the last ring can be a single shuttle split ring, leaving no tails to sew in. Have fun!

Tuesday, September 1, 2020

More Tatting Added to the Jacket


 Using the medium shade of green thread left over from the center leaves (plus yellow and orange), I made up the 1st long floral side motif as I went along. Then, I used the finished piece as a guide for tatting the 2nd motif to match. The techniques included are encapsulation, daisy picot, Josephine rings, and a little bit of spiral chain near the bottom.


After pinning the tatting in place I sewed it on using white thread to match the jacket. 

For the jacket lapel, I wanted a 3 dimensional button look, so I sewed around the center of the flowers only, leaving the petals free. Pattern is Double Flower Celtic.

Butterflies on the shoulder. Pattern is Flutterby Heart.

I'm already happy to wear the jacket as it is. But it will continue to be a work in progress.

Saturday, January 4, 2020

Early Beginnings of a Celtic + Floral Theme

 Wishing everyone happy creativity in 2020!

My first design experiment this year resulted in a necklace combining a simple Celtic motif with encapsulation (tatting over multiple core threads). The brightly colored floral effect comes from bringing out a multicolored thread out from the core to tat with, then returning it back to the core and tatting over it with the main color. I plan to do a better explanation later with a video demo. Also perhaps a better design, but actually I really like this necklace - the wire wrapped beads quiver constantly when worn, making an eye-catching statement!


 The following pictures show bright green tatted chains being woven "over and under" through a tatted brown motif, using a narrow Celtic shuttle. More to come later!


Friday, November 1, 2019

Pizazz, Kinetic, and Wire


A fresh batch of Pizazz hand dyed thread is done and listed on Etsy. It's satisfying to see how bright these colors are when dry, since they're darker when the wet dye is applied.
Leaf earrings using Pizazz thread, from the pattern Small Maple Leaf.

Earrings in hand dyed and Lizbeth Metallic from the pattern Kinetic.

I combined tatting with wire wrapping to make this mixed media pendant.
Playing around with more ideas!

Interested in the basic techniques I'm using for wire wrapped tatting pendants?
See my video on YouTube.


Monday, July 31, 2017

Encapsulation and the stone pendant

 In this pendant, I used a Mookaite Jasper stone with colors that went well with my "Knitty Gritty" hand dyed thread. Using inspiration from several wire-wrapping tutorials that I found in books and online I launched forth into wrapping the stone.

I tatted the flower motif separately. Then, when I got to the place in the wire-wrapping where I wanted the tatting to be, I wrapped the wire over the tatting. To clarify, I only wrapped the wire over the tatting in a few places, to catch it in place. I folded the tatting out of the way to continue the wire-wrapped pattern underneath. 

The methods I use for tatting the little flowers are Josephine rings (rings tatted using only the same half stitch repeated) and encapsulation (tatting over multiple core threads). Scroll down for the tutorial on these techniques.
Wire weaving in progress.

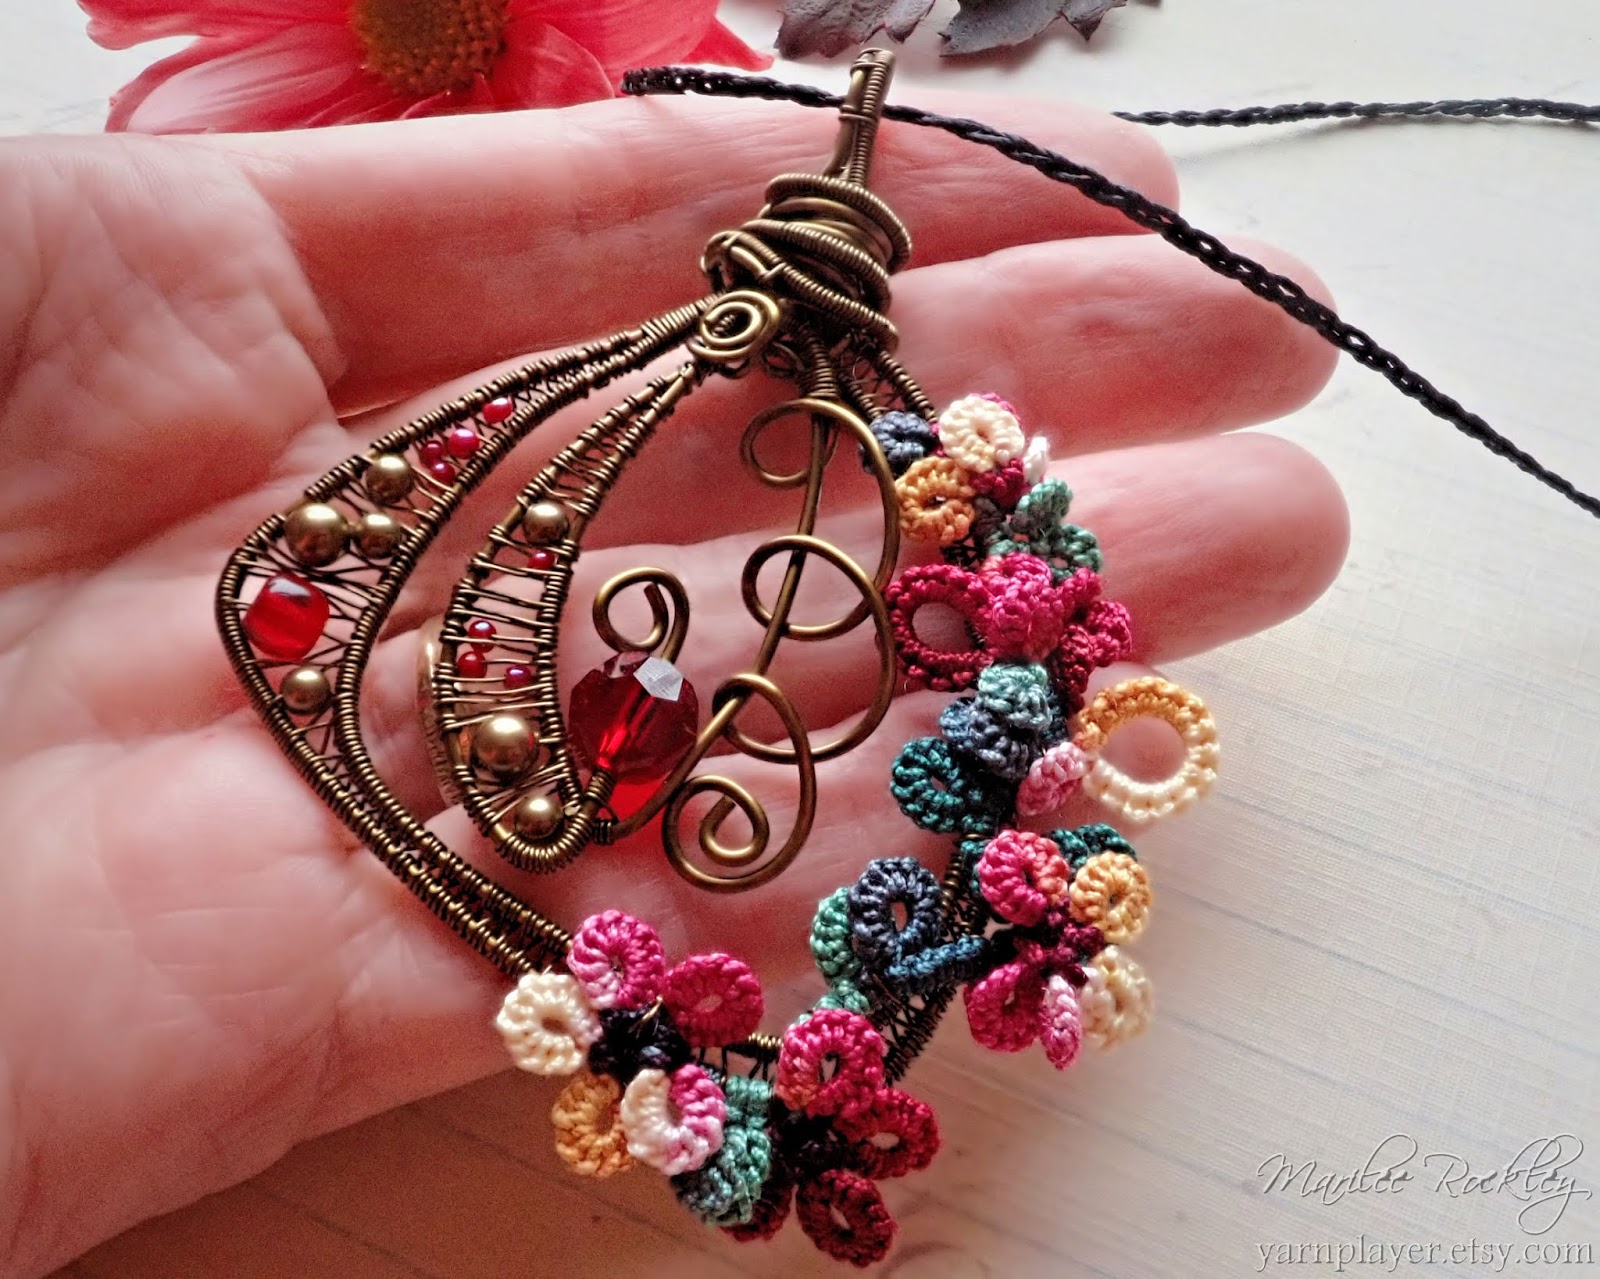
Catching the tatted motif in place, while continuing to weave the wire under the tatting.

The front side of the finished pendant.

The back side of the pendant.

 Here's a tutorial on the encapsulation technique that I use for the little flower motifs.

You need at least 3 threads. For this example I used a continuous multicolored thread on 2 shuttles plus a contrasting color on a 3rd shuttle. 

 The threads can be knotted together, but I like to get started without a knot. I pick up one of the shuttles with the continuous thread, which is the color that I want for the rings (flower petals), and tat a Josephine ring. I like to use the 1st half of the double stitch only, because it gives a tighter ring. But, the 2nd half of the double stitch can be used instead, for a looser look. The differing results are because the 1st half tightens the twist in the thread, the 2nd half loosens the twist. I usually put 9 to 14 half stitches in these rings, which must be closed carefully because the thread wants to kink.
After closing the ring, a short chain follows. Hold both of the continuous threads and the tail of the contrasting thread. The tail needs to be long enough to tension it along with the other threads for the multiple core of the chain. (Note: at some place along the "stem" of the flower motif the tail can be abandoned and cut off later. This is how I start the motif without a knot and no tails to sew in.)

 Wrap 1 unflipped double stitch over the multiple core threads. I used 2nd half first, 1st half second for this, but the other way around works too.
Pick up the same shuttle that you used for the first ring to tat the next ring. It is important to keep a main core thread sliding freely inside the chains for the flower, to be able to snug the flower up tightly when it's done. Only after the flower is closed, can any of the threads be used freely.

Follow each ring with an unflipped double stitch wrapped over the multiple core.

Use as many petals as you wish for the flower. Follow the last ring with 1 unflipped double stitch chain. Then, to close the flower and continue with a chain for the "stem", put the chain thread on top, leaving the multiple core threads below, between the 1st and 2nd rings.

Wrap unflipped double stitches for the "stem" chain. If you want the stem to curve upward, bring the wrapping thread under the multiple thread core, then tat first half, 2nd half. To curve the stem downward, leave the wrapping thread below the core and tat 2nd half, 1st half.

After a few stitches, pull the main core thread to tighten the flower. From time to time, also tug the other threads to keep everything nice and tight.

Continue the flower motif any way you wish, throwing off "leaves" and "buds" using any of the threads. To end off, the extra threads can be hidden inside the final rings, and the last ring can be a single shuttle split ring, leaving no tails to sew in. Have fun with it!