Showing posts with label necklaces. Show all posts

Monday, January 5, 2026

Vision pattern necklace and earrings sets


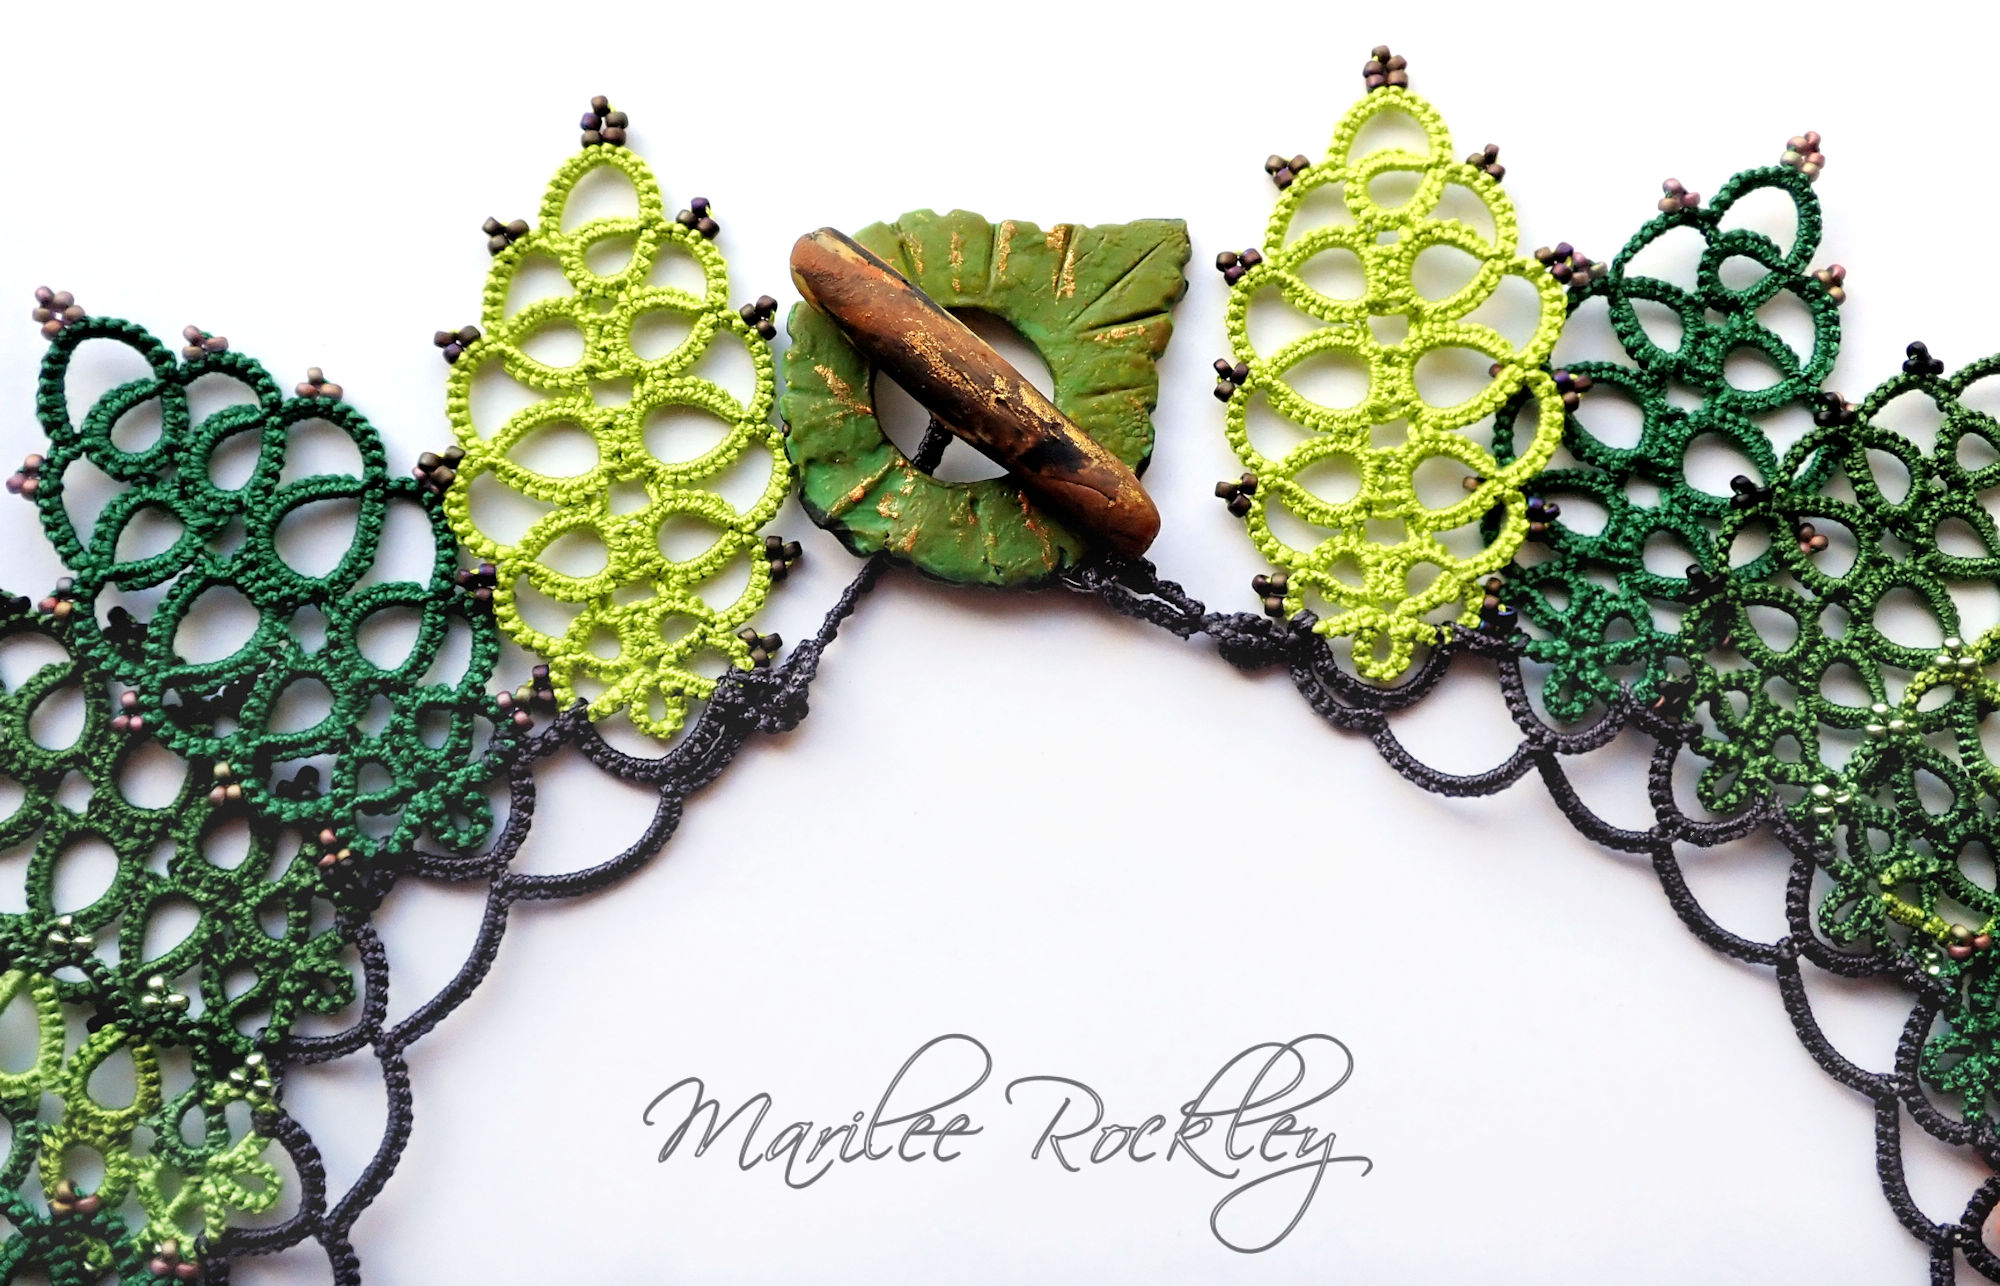
The necklaces are from my "Vision" necklace pattern which is found on the Free Patterns page of this blog. It's one of my very early patterns and recommended for experienced tatters. I recently updated it with some in-progress photos but the pattern is still difficult. What can I say? I love the design! 

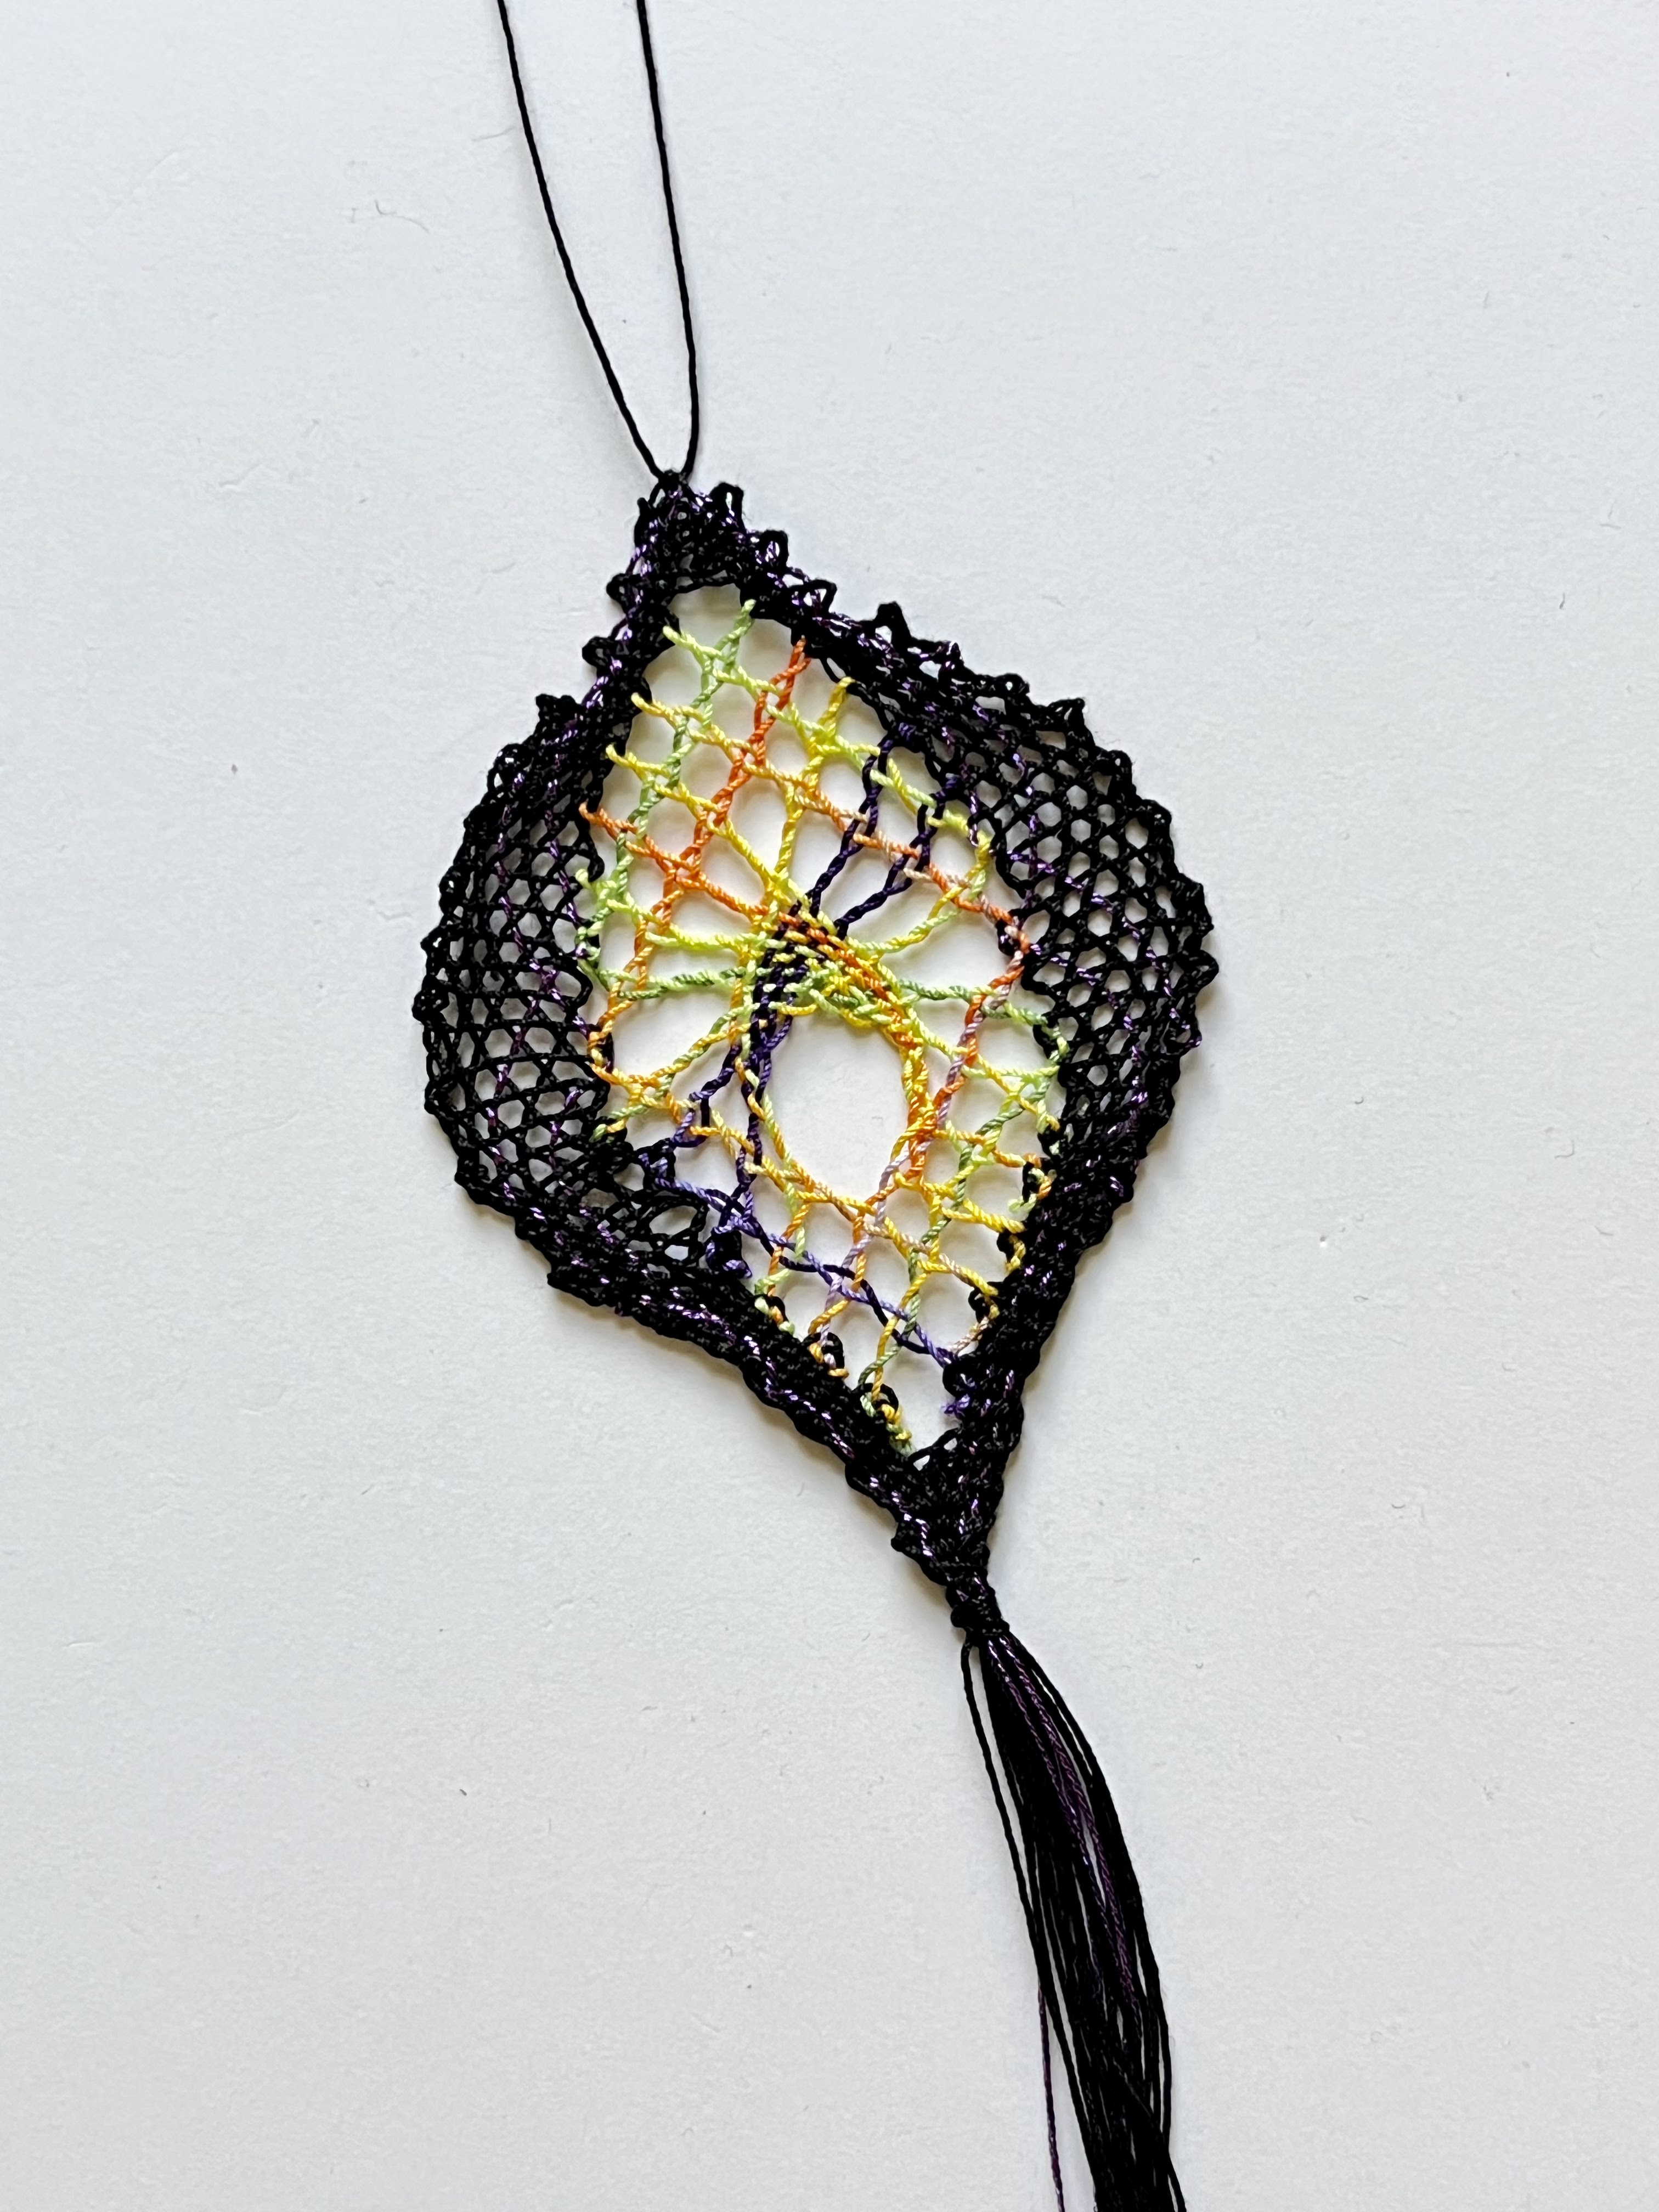
The earrings pattern is also called "Vision" and is found in the "Boutique Tatting" book. 

But I have a confession to make :-O

Back in the day (early 2000s) my tatting technique was different (less sophisticated) in that I always started a split ring with shuttle 1. That resulted in the split ring "turning itself over" after it was made. I haven't done it that way for years, but back when I wrote that book I still did. 

Even worse, many of the "reverse work" instructions in the written directions for that earring pattern don't make sense to my current method of tatting. The numbers and where to join are all correct, though. The photo diagram is correct. It's a cute design, just tricky!


Saturday, November 8, 2025

Leaves of Lace featured in Plantarium


My artwork 'Leaves of Lace Garland' is now being showcased at Plantarium - 2025 exhibition, organized by Gallerium and powered by @Biafarin platform.


To learn more, please go to:

All of the artwork has a "plants" theme, and there is a wide variety of media used, including painting, sculpture, photography, fiber art, mixed media, etc. There are 105 works displayed. I think you'll enjoy looking at the online exhibition!

Wednesday, October 29, 2025

Tatting through designer's block


The "harlequin" and "stars" elements were finished weeks ago (or has it been months?) and were placed in a container to await inspiration for finishing. In the meantime, life went on. Then, earlier this week I used the "just do one thing" approach by moving the container to my work table. There!

On another day, I took the motifs and supplies out of the container. Another accomplishment!

Yesterday, I wondered about which thread to use for tatting the various elements together. Nothing suitable! But then, I remembered that I had some of the new Liz Metallic size 40 Icy Blue. So, I put that on a shuttle and tatted a ring, then a chain, counting the stitches to reach the next picot, and then to reach the next motif leaving what seemed to be enough space... and now a start on putting it together has been made. Yay!!!

The rest will come - I hope. ☺

Friday, August 8, 2025

Slow lace and beading

Slow art piece in progress


A little peak at what I'm working on. The colors in the harlequin shapes as well as the bright yellow beaded crystals were inspired by The Starry Night painting by Vincent van Gogh. I'm at the stage of "Now what!" But, eventually an answer will come, a little at a time.

The large yellow beaded crystal is built around a center called a "cushion" 10mm across, not really round (a square with rounded corners) but it looks round enough with the peyote beading around it and the tatting.

In between working on that art project, I've added some more things to my "Marilee's Tatting" shop. At the top of this blog there's a tab labeled "Online Store", click on that and it takes you there.

Adelia pendant in teal and purple

Hand dyed thread "Pond"


Friday, February 14, 2025

My artwork is in Artistonish magazine!


I'm so excited to share!

My artwork 'Leaves of Lace Garland' is now published at Artistonish - January 2025 magazine via @Biafarin portal.

To learn more, please go to:

Read the magazine via the below link:


Thursday, November 7, 2024

Re-sharing my Dissent Collar pattern


The only techniques used in this pattern are ring, chain, reverse work, picot, join, and lock join. 

Tat the top row across first, shown in gray on the diagram. Then continue tatting down and up for each narrow section. The picots between the narrow sections need to be gradually larger to enable the sections to fan out nicely.

I made mine using size 10 thread, but since this collar is worn like a necklace, the size doesn't really matter.


Top row and first section in progress

Beads can be added inside the top rings.
I'm using 6mm beads with size 10 thread in the photo above.


My tatting pattern was inspired by seeing a picture of RBG's dissent collar. ♥

Ruth Bader Ginsburg


Wednesday, October 30, 2024

Leaves of Lace Garland is finished


"Leaves of Lace Garland" by Marilee Rockley 2024

My leaf project is done! 

I'm quite happy with the results, and since I'm already a subscriber to Fiber Art Now magazine I've gone so far as to sign up for a CaFÉ account so that I can enter my fiber art into exhibitions. Maybe this will give me incentive to do more larger "art" pieces.☺ Of course, we know that all tatting is an art (not lost!) 

Details: There are a total of 32 tatted leaves in this garland. I started with a vintage leaf pattern and modified it to make leaves of varying sizes, adding an edge to the branch end of each leaf so that they could be joined together later. All of the leaves are in size 20 thread, using Lizbeth, Flora, and my own hand dyed to get a variety of colors.


To join the leaves together I chose a dark charcoal gray thread, and tatted 2 rows of chains only, the first row to connect the leaves, and the 2nd row to stabilize the arrangement. The leaves are still free to "flutter". No stiffening was added to them, but my lace is quite firm as I naturally tat tightly.


I made a clasp of polymer clay in a branch and leaf shape to finish the garland.


Friday, October 18, 2024

Progress on the leaf necklace


Having completed tatting enough lace leaves (despite being interrupted several times by more urgent matters) I was faced with the question of how to join them all together. One of those creator's block moments. Fortunately, I had some reject leaves left over to practice joining ideas on, which besides giving me an idea of stitch counts showed that green was not the color thread I wanted. Dark charcoal gray shows off the leaves much better! Similar to tree bark from a distance.


This is still a work in progress. I missed the deadline for a juried fiber art exhibit that I had planned to submit to, but there will be others. 

The leaf pattern is vintage, though I tweaked it a little to make different sizes. More about the leaf pattern on this post.


Saturday, April 6, 2024

Swords Into Plowshares


The "Swords Into Plowshares" necklace is one of my more difficult tatting patterns, including the technique of using 2 half stitches to turn a chain so that floating rings form on both sides. Actually, that would work well for making leaf shapes, also!

It has been so long since I made this pattern that I made a mistake putting the flower in the center, but then I decided that I liked it! It's a nice variation. But, I have not added the variation to the pattern, oh gosh, no! 
However, the necklace is in my Etsy shop. The Swords Into Plowshares pattern is also on Etsy.

Here's some snapshots from the short video that I posted on TikTok (and even shorter video that I posted on Instagram):


Another necklace is in progress, which is being tatted according to the pattern this time! Different colors, though. I got the idea for these colors from Van Gogh paintings of Irises.


Thursday, February 22, 2024

Sea green Victory and beginning a peace symbol


Done! This "Victory" necklace in my own hand dyed sea green (the darker color) and Lizbeth number 686 Seagreen Lt. My finished necklace is listed in my Etsy shop here and the pattern is there.

Something I learned is to measure the round beads! Just because it says "6mm" on the package doesn't mean that the beads actually measure 6mm! The quartzite stone beads were a little larger, which explains why the tatted ring around the focal bead at lower center didn't quite fit, and it took less beads to make the neck cord the correct length.


So then, I came up with earrings to match, sort of. The last join on these is a rather tricky folded join, but otherwise they're fairly simple. I might write this up as a free pattern someday.


The earrings in progress

_______________________________________________________

New experiment combining tatting and wire-wrapping is in progress! 

I'm trying to make a peace symbol, the iconic 1960s peace symbol, out of wire and adding tatted "flowers" on it in a way similar to my other wire with tatting pendants. We will soon see if this works! 

To form the wire shape I followed the DIY Peace Sign Earrings video demonstration by Heather Boyd Wire on YouTube. Changes I made include continuing the wire up over the top (to form a bail later) and I added a 2nd circle of wire around the outside to make a doubled edge, which makes a wider border and will keep the tatting facing front.

My concern is to keep the peace symbol recognizable while being covered with the tatted "flowers". A work in progress....


Friday, November 10, 2023

Pattern for Victory necklace and more Snowflake


The story behind this necklace is that I saw a picture of a vintage tatted collar (I think it was from the 1940s) and decided to embellish it. I'm sure that I've seen other variations online based on the same collar pattern, but I think mine is different enough to call my own. Someone actually asked me to write up my version of the "Victory" pattern some time ago and I'm sure the message is somewhere in the vast array of messaging services we have these days but I couldn't find it. Anyway, the pattern is done!

The pattern is listed in my Etsy shop so you can read all the specifics there. Although I use size 20 thread to fit with the beads chosen, of course any size of thread can be used without any beads, the tatting will just turn out larger or smaller. 

In addition, I posted a video on YouTube demonstrating putting a bead in the center of a ring, showing how it's done in the pattern.
________________________________________________

New batch of  "Snowflake" hand dye thread just listed in my Etsy shop also.


_______________________________________________________

In bobbin lace, I finished my first try at a pattern I'd been wanting to figure out for years! It's from a French book Bijoux En Dentelle by Colette Varet and the pattern is called "Pareis". 
The original in the book was made from wire. I made mine using Liz Metallic size 20 and some Lizbeth size 20 thread. My collar has flaws but it's wearable! I learned a lot from working the pattern. 
I used Google translate to understand the little bit of written instructions that were in the book. The diagrammed pattern is excellent, but since it showed just half of the collar it needed to be photocopied from the book with the 2nd half reversed and put together to prepare a printed pattern. I think I enlarged my copy 104%. I'm pleased with the results and the Liz metallic is nice and stiff so it seems almost like wire. Now I have the pattern so I want to make another!


Thursday, October 12, 2023

Progressing on "Victory" pattern


An in-progress photo from my version of the "Victory" pattern. 

Slowly, I've been making progress on writing up my necklace version of the "Victory" pattern, based on a vintage collar pattern of the same name. The vintage pattern can be found in "The Tatter's Treasure Chest" published by Dover. My pattern varies slightly from the original collar and has beads added. Quite a while ago someone asked me to write up my version, so I'm finally getting around to it! Probably several weeks before I have it finished.

My necklace laid over the photo from "The Tatter's Treasure Chest"

_______________________________________________

Bobbin lace ornament from a Jenny Brandis pattern

I messed around with a Jenny Brandis ornament pattern that is rather too advanced for me at this time! I like the results, but it bothers me that in order to keep the colored thread separate from the black I tied knots and cut, which seems wrong to me! Eventually I may try again.


Tuesday, August 29, 2023

Okay, so now I also do bobbin lace


Pattern is by GaliciaBee
The pattern is by GaliciaBee and it's so pretty and good for beginners. She also does videos

My current work under the pins is from one of her beautiful thread kits. I added some Lizbeth metallic size 20 to it, and I'm loving the combination.


I still do tatting also! Currently I'm in the process of writing up my version of the "Victory" necklace. Eventually I hope to offer my version of the pattern in my Etsy shop.


Friday, July 14, 2023

Tatted lace "Phoenix" necklace


Tatted lace necklace from "Phoenix" pattern in dark ecru and shaded greens.

For this necklace I chose size 20 Lizbeth thread in the color number 693 "Linen Medium", and some of my hand dyed from the "Pond" batch, also size 20. 

The 3 round center beads are size 4mm, and the seed beads size 15/0. The bottom center dangle is an 8mm bead. The tatted motif measures about 6 inches (15 cm) across. This is a smaller, more delicate lace necklace than the same pattern tatted in size 10 Lizbeth (see the bottom photo for a size comparison). With size 10, larger beads are required. 

The "Phoenix" pattern is my own original, and is available for purchase as an instant download from my Etsy shop HERE. The pattern also includes a smaller, slightly simpler version as well.

A join between beads in a tatted ring.


The "Phoenix" necklace in progress.

Size comparison:
"Phoenix" necklaces (blue on top, then the orange and red) tatted in size 10 Lizbeth thread.
Bottom necklace in size 20 Lizbeth from the same pattern. 


Friday, March 31, 2023

Celtic Triangle Necklace pattern


This pattern is now available from my Etsy shop. 

Tatting techniques used include ring, picot, chain, join, Catherine Wheel join, bead picot, and floating ring. It's written from the shuttle tatting point of view, since that's what I do, but the pattern should be do-able for needle tatters as well, and they wouldn't even need a Celtic shuttle!

The center part of this pattern is a demonstration in one of my video lessons on Craftsy, in the "Next Steps In Shuttle Tatting" course. But, the extensions on the sides and bottom are new, and since so many people asked how to do this version of the motif it is now written as a pattern with stitch count photographs, written directions in English and several in-progress photographs.

 Be aware that this finished motif does require three 7mm jump rings to hold the parts together to keep it stable, otherwise the tatted extensions would just flop around loosely. That's one of the reasons that I hesitated in offering this version as a pattern. But, the jump rings do give it a rustic appearance and are decorative. I used Vintaj natural brass roped cable jump rings on the model, but any kind can be used as long as they're the correct size.

I finished the pattern model with 2.4mm cable chain, smaller 6mm jump rings to fit the chain, lobster style clasp, and extender chain. Of course it can be finished in many other ways, tatted in many colors, and I'm looking forward to seeing the creativity of others using this pattern!