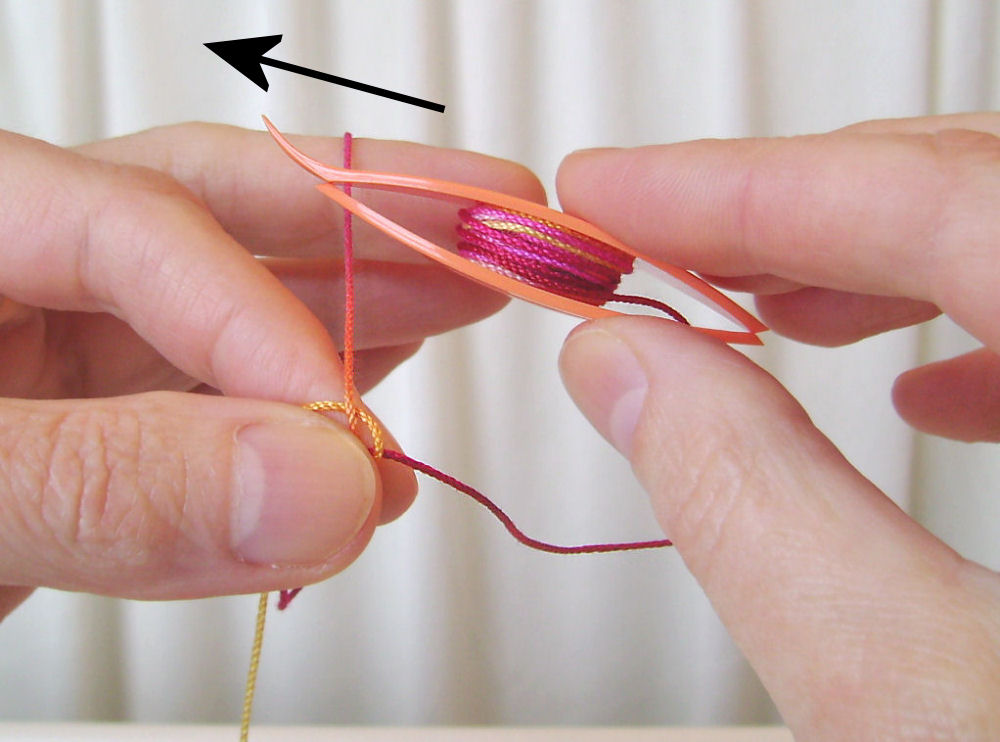
Let the shuttle thread hang down. Shuttle goes over the thread on left hand...
...over the thread...
...when the shuttle has passed over the thread, come back under that thread...
...back under the left hand thread, and through...
...the loop from the hanging shuttle thread.
Almost done - now comes the flip...
Make the flip happen by relaxing the tension on your left hand (bring your fingers down, slightly closing left hand)...
...and pull the shuttle thread tight - to the right. There is the 2nd half! Bring your fingers back up on your left hand to tighten the tension. Keep the shuttle thread tight. See how the shuttle thread is the core over which the stitch slides.
The completed double stitch.
These photos are my attempt to show the classic method of shuttle tatting. In actuality, I hold my shuttle in a slightly different manner, but the manipulation of the thread is just the same. I've shown the 1st half of the double stitch on a previous post; to see the 1st half click here.
I thought about calling this batch "Shabby Rose" or "Faded Rose", but decided that there is nothing "shabby" or "faded" about my hand dyed threads ;-) Actually, they're not "olde" either, but I couldn't think of a better name that was short. (I like short names for my dye batches - less to write on the tag!)
Embellished with size 8/0 beads in the picots, a brass lock charm added at the bottom, and brass chain attached. I used size 10 Lizbeth cotton in the Victorian Red color.
It's the same as my basic Unfolding Heart pattern, I just added beads and chain to make it into a necklace.
My new original pattern!
It reminds me of the way plants unfold as they grow. I think the heart looks pretty with or without the outer framing round. The pattern is for sale as a pdf in my Etsy shop.
This 6 minute video shows several ways of working with beads, while I am tatting my Dream pattern, as a pendant. The thread I'm using is size 10 Lizbeth which I hand dyed. The seed beads are size 8/0.
Note: the one-sided leaf bead is strung onto the thread shiny side down, in order to make the shiny side come up correctly in the finished pendant. That works for this pattern!! I don't know how to make those one-sided beads come right side up in all circumstances...sigh.
I hope you enjoy this video. Be sure to turn your speakers on, the tatting is accompanied by music from SmartSound.
Brighter than blue jean blues. The colors and the name of this batch was inspired by a many-talented friend who beads, teaches, plays flute and violin, drives a car with standard (stick shift) transmission - and loves the color blue!