Yes, I have tatting classes on the calendar at Discovery World! Actually, at the time of this writing, I just gave my approval for the flier that was prepared, so you may not see my classes listed on the Discovery World calendar yet. But, here is a link to the flier that will be distributed.
So, I have to get those student kits ready! Only 4 days into the futuristic-sounding New Year of 2011, and already I am scrambling to catch up. I know many are waiting for the next batch of hand dyed thread - it will be "Sue's Blues", that should be dyed, dryed, and listed in a few more days.

Tuesday, January 4, 2011


Thursday, December 30, 2010
My tatting video
This 4 minute video shows tatting a ring, picots, reverse work, tatting a chain, and joining 2 rings. The way I hold my shuttle is comfortable for me - each individual will tat in a slightly different way. (This video was made using an old camera, so the picture quality is poor, but might still be helpful for someone learning to tat.)
Tuesday, December 28, 2010
How to tat - the 1st half of the double stitch
 |
| For the way that I tat, I like the shuttle wound counterclockwise, with thread coming out the side that is away from me. |
 |
| If starting a ring, wrap thread all the way around left hand. |
 |
| Thread is wrapped around left hand and pinched between thumb and forefinger (if tatting a ring). The right hand, holding the shuttle, lifts the shuttle thread up, out of the way... |
 |
| ...shuttle goes under both threads... |
 |
| ...under both threads ... |
 |
| ...under both threads - sliding the shuttle all the way under the thread that is on the left hand. Once it is past that thread... |
 |
| ...come back now, over the left hand thread. It's okay to let the thread from top of right hand slip off at this point, since you are still going under that right hand thread. |
 |
| Almost done - now comes the flip... |
 |
| Make the flip happen by relaxing the tension on your left hand (bring your fingers down, slightly closing left hand)... |
 |
| ...and pull the shuttle thread tight - to the right. |
 |
| There is the 1st half! Bring your fingers back up on your left hand to tighten the tension. Keep the shuttle thread tight. See how the shuttle thread is the core over which the stitch slides. |
The 2nd half is shown on another post; to see the 2nd half, click here.
Tuesday, December 21, 2010
A pair in blue and gold

The Handmade Jewelry Club liked this pattern so well they featured it on their website! I'm happy that tatting is gathering more interest and sparking new ideas.
Wednesday, December 15, 2010
Layered Ring Christmas Tree
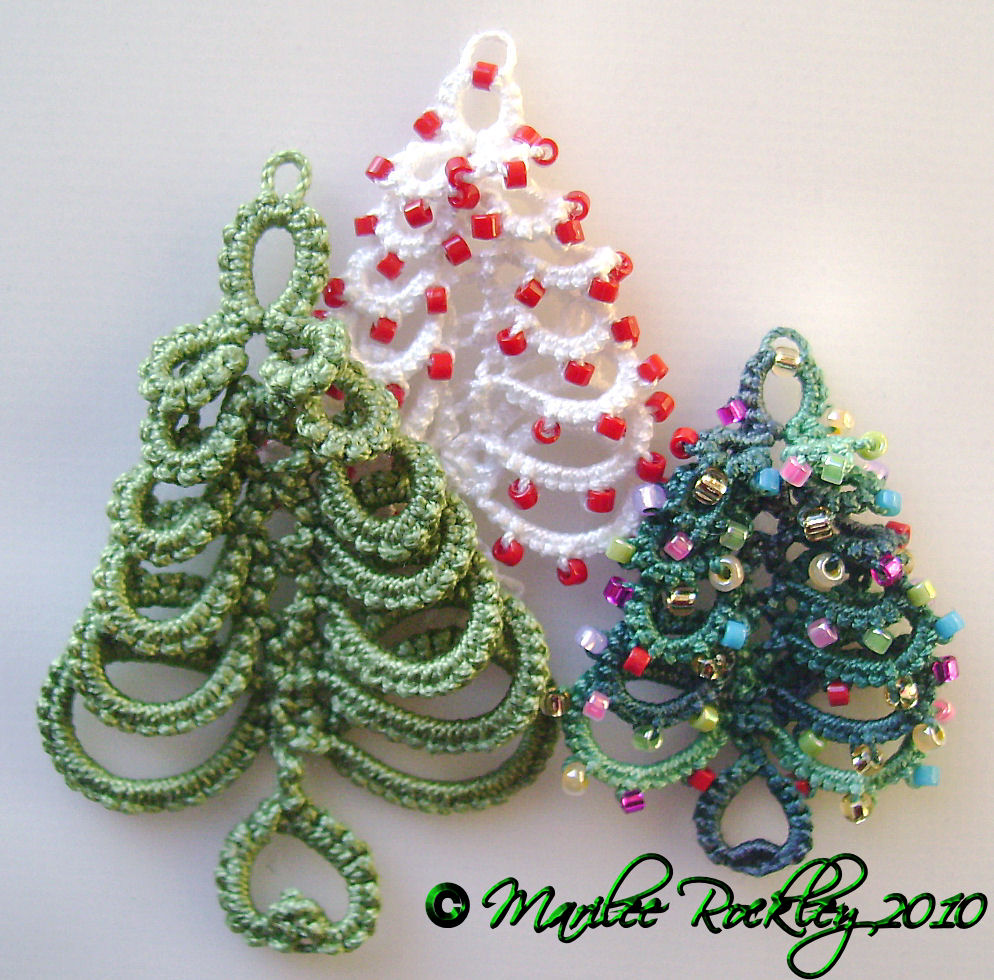
The basic concept of the tree is pretty simple, just one shuttle and ball of thread, but the pattern was a lot of work to finalize and write up. There is not a diagram with this pattern - it was just too hard to draw one that made sense with the 3 dimensional effect of this design.
I ran out of time to make more and better models of the tree, which in size 20 thread makes a nice size for earrings. Busy, busy with Christmas preparations - making cookies, wrapping gifts, practicing cello for the concert and Christmas Mass, and DH just volunteered me to bake 2 kinds of bars for his office potluck...but, it's all good fun!
Friday, December 10, 2010
Working on a new design

When finished, I'll add the pattern to my Etsy shop.
Subscribe to:
Posts (Atom)